

Oh hot, fresh bread…how I love thee! I’ve been addicted to The Great British Baking show since the holidays and I just want to quit my job and bake forever! One of my fave weeks of the show was “Bread Week”, as I was so inspired to attempt making my own. I go gaga for Olive Break and filled this one with Castelvetrano Olives from my local market. This recipe is adapted from Sally McKenney from Sally’s Baking Addiction whom I love! I included my tips and tricks below. This bread tastes amazing toasted in the morning with some homemade jam.
INGREDIENTS.
- 3 and 1/4 cups (about 430g) bread flour, spooned and leveled (plus more as needed for shaping and pan). I use King Arthur’s Bread Flour, and they do have a gluten-free bread mix.
- 2 teaspoons instant or active dry yeast. I prefer instant yeast as it’s easy for first-time bakers.
- 2 teaspoons coarse sea salt
- 2 teaspoons dried oregano. This is optional, but it makes the bread taste amazing!
- 1 and 1/2 teaspoons garlic powder. This is optional, but it makes the bread taste amazing!
- 1 heaping cup roughly chopped olives, pitted. I love fresh Castelvetrano Olives or Kalamata Olives.
- 1 and 1/2 cups water, close to room temperature at about 70°F (21°C)
- Optional: cornmeal for dusting pan
NOTES:
- There is no kneading of the dough required.
- There is no Stand Mixer required.
- 90% of the time is totally hands off.
- You can bake this in a dutch oven or on a baking sheet.
- You can let the dough rest in the refrigerator for up to 3 days.
- Tastes amazing sliced, toasted and with butter and homemade jam!
INSTRUCTIONS.
I know this looks like a lot to do, but it’s basically 4 things: mix the ingredients, set aside to let the dough prove (rise), score (make small slices) the bread before baking, and bake!
(1) Mixing. In a large un-greased mixing bowl, whisk the flour, yeast, salt, oregano, and garlic powder together. Mix in the olives. Use a spatula at first to mix the ingredients, and then switch to using your hands and ensure all of the flour is moistened.
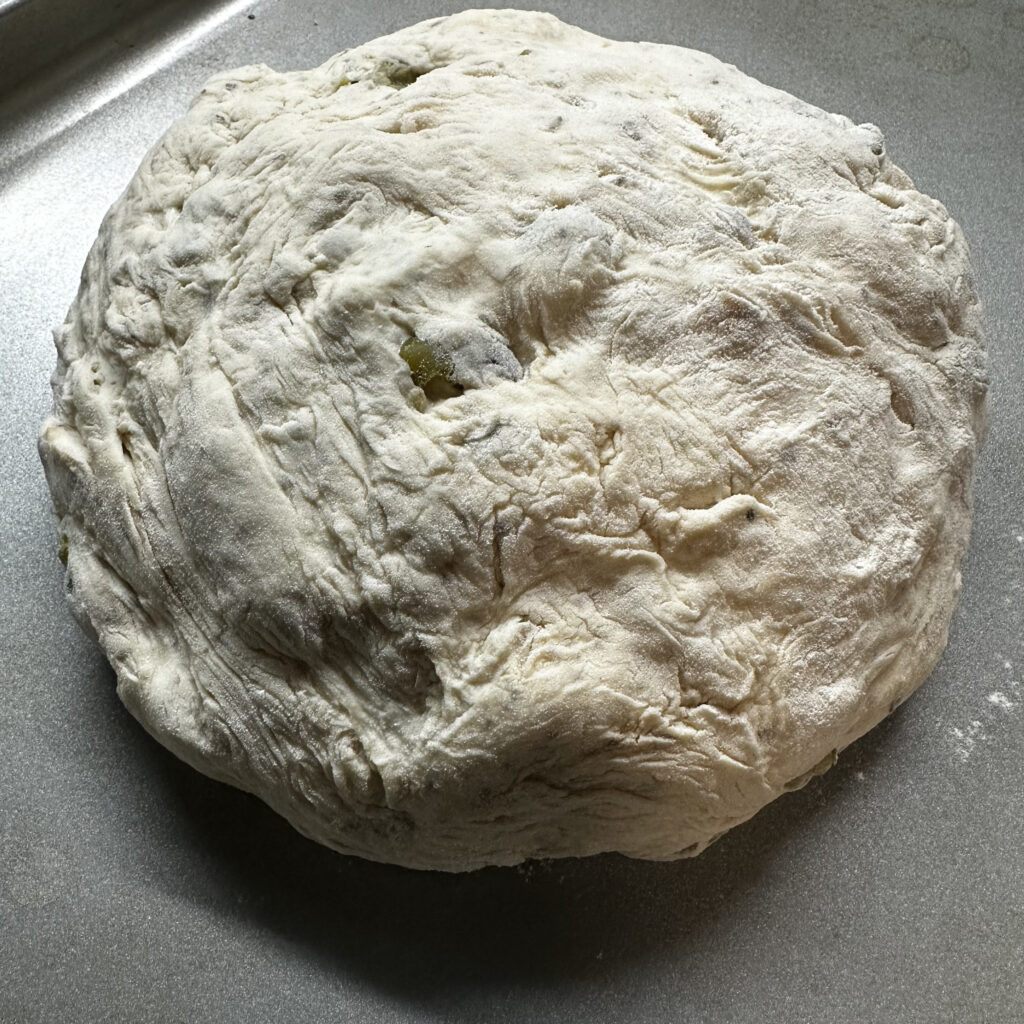
Pour in the water and gently mix together. The dough will seem dry and shaggy, but keep working until all the flour is moistened. Use your hands to work the dough ingredients together and shape it into a ball. It’s too sticky for a stand mixer so work it as best you can with your hands.
(2) Proving. Place the dough in a glass bowl, cover it with plastic wrap or aluminum foil, and place the bowl on your counter to let it prove. Alternatively you can use a proving basket. Proving is the dough’s final rise that happens after shaping and just before baking.
Allow the dough to prove (rise) for 2-3 hours. The dough will just about double in size, stick to the sides of the bowl, and have a lot of air bubbles.
For the best flavor, I strongly recommend refrigerating the risen dough even if it’s just for a few hours. You can refrigerate the dough for up to 3 days.
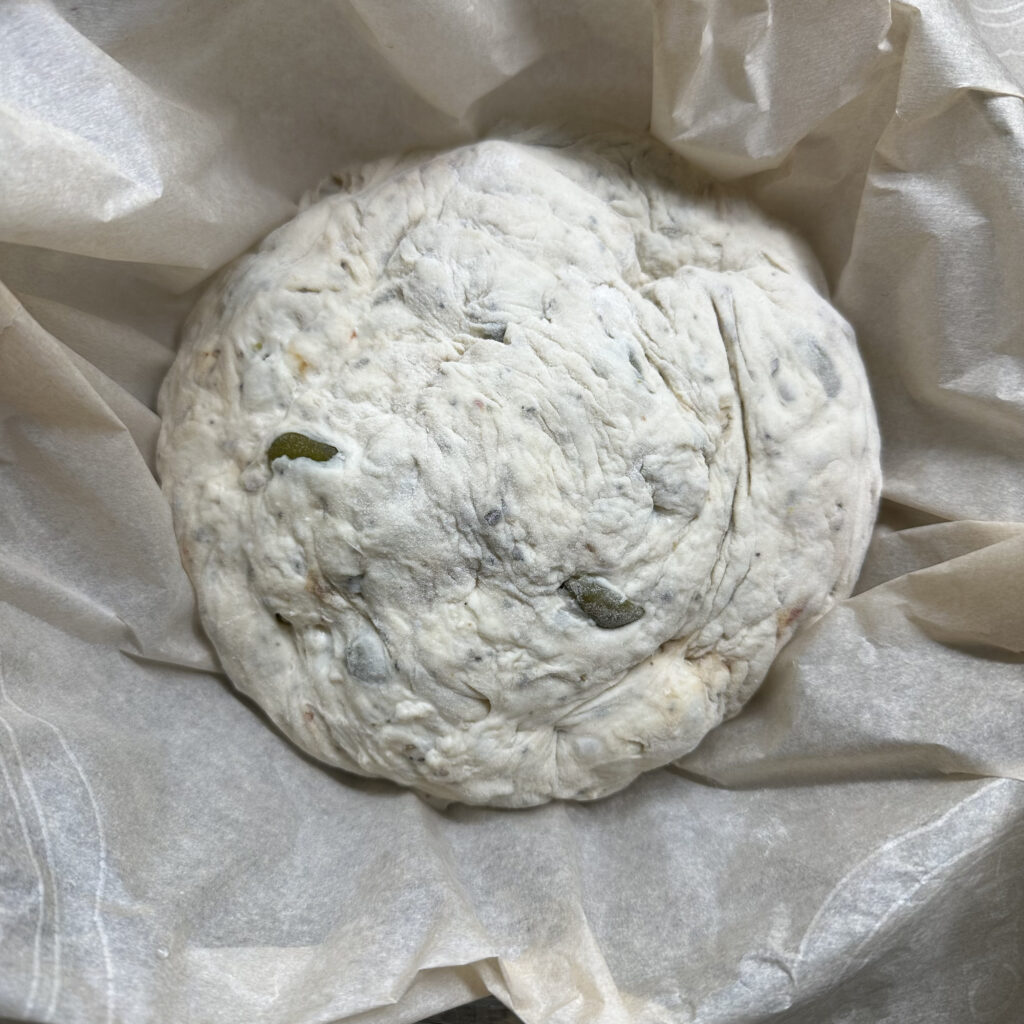
After the dough rises and rests in the refrigerator, pull the bowl out and use generously floured hands to shape the dough into a round boule or ball-like shape.
Loosely put the ball shape back in the bowl and cover the again with the plastic wrap or aluminum foil. Allow dough to rest for another 45 minutes but during these 45 minutes, preheat the oven to 425°F (218°C).
(3) Scoring. Score the dough with a bread lame or sharp knife before baking which allows the wet, airy dough to “breathe” as it rises and bakes.
When you’re ready to bake, using a very sharp knife or bread lame (some even use kitchen shears), score the dough with a slash or an X, about 1/2 inch deep. (“Score” = shallow cut.) If the shaped loaf flattened out during the 45 minutes, use floured hands to reshape it into a ball.
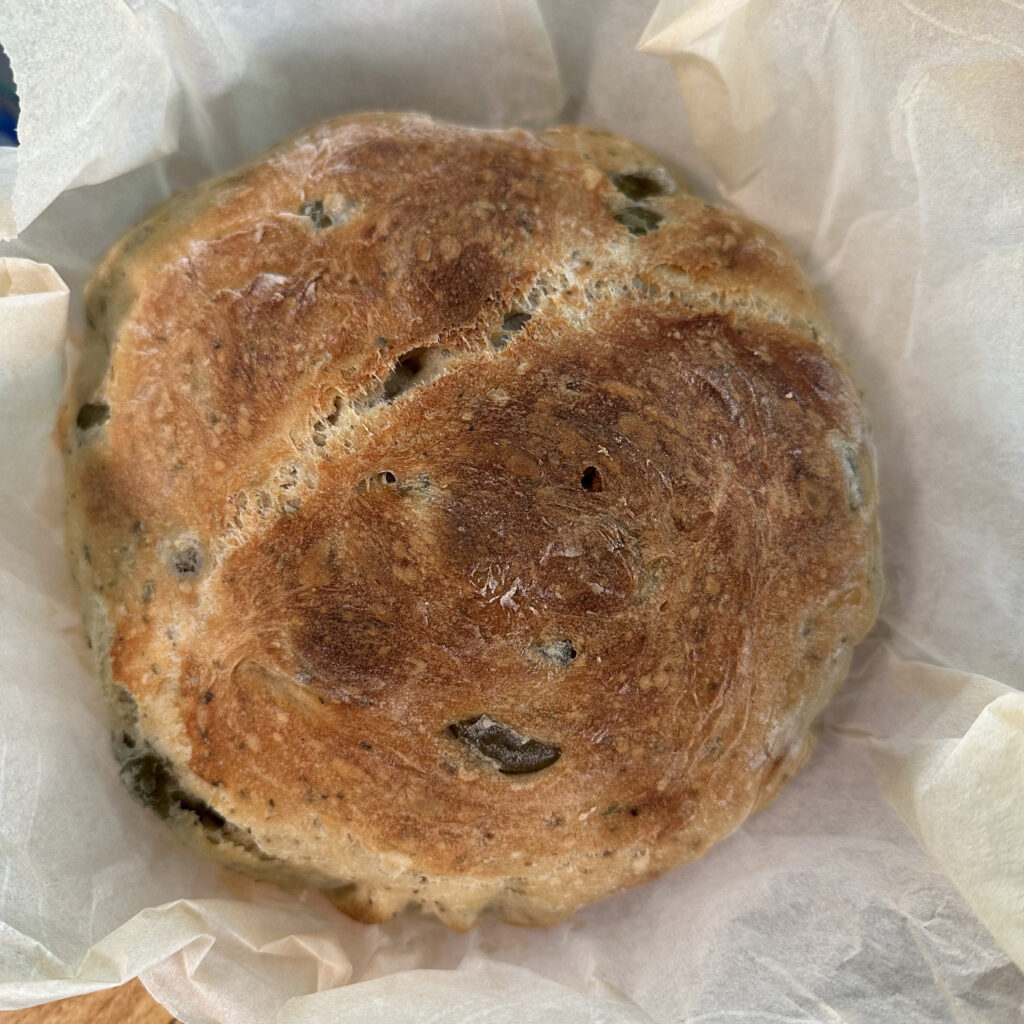
(4) Baking. You can use either a baking sheet or a Dutch Oven to bake your bread in. Baking the olive bread in a covered dutch oven traps steam inside the pot, creating that perfect crust. If you don’t have a dutch oven, a nonstick large baking sheet is best.
- Baking Sheet: Lightly dust it with flour and/or cornmeal. Place the dough on top, cover it, and let it rest as the oven preheats.
- Dutch Oven: Place the empty dutch oven with the lid in the oven as it preheats. Place the dough on high heat-resistant parchment paper and then fit it inside a bowl to shape. Cover with plastic wrap or aluminum foil and let the dough rest as the oven preheats, and then place the bread with the parchment paper in the hot dutch oven before baking.
Optional for a slightly crispier crust: After the oven is preheated and the bread is scored, place a shallow metal or cast iron baking pan or skillet (I usually use a metal 9×13 baking pan) on the bottom oven rack. Carefully and quickly pour 3-4 cups of boiling water into it. Place the scored dough/baking pan on a higher rack and quickly shut the oven, trapping the steam inside. The steam helps create a crispier crust.
Place the shaped and scored dough (on the flour/cornmeal dusted pan) in the preheated oven on the center rack. Bake for 35-40 minutes or until the crust is golden brown. If using a Dutch Over, bake with the lid on 25-30 minutes and for the last 5-10 minutes, remove the lid.
How to test for doneness– give the warm loaf a light tap on the bottom. If it sounds hollow, it’s done. For a more accurate test, the bread is done when an instant-read thermometer reads the center of the loaf as 195°F (90°C).
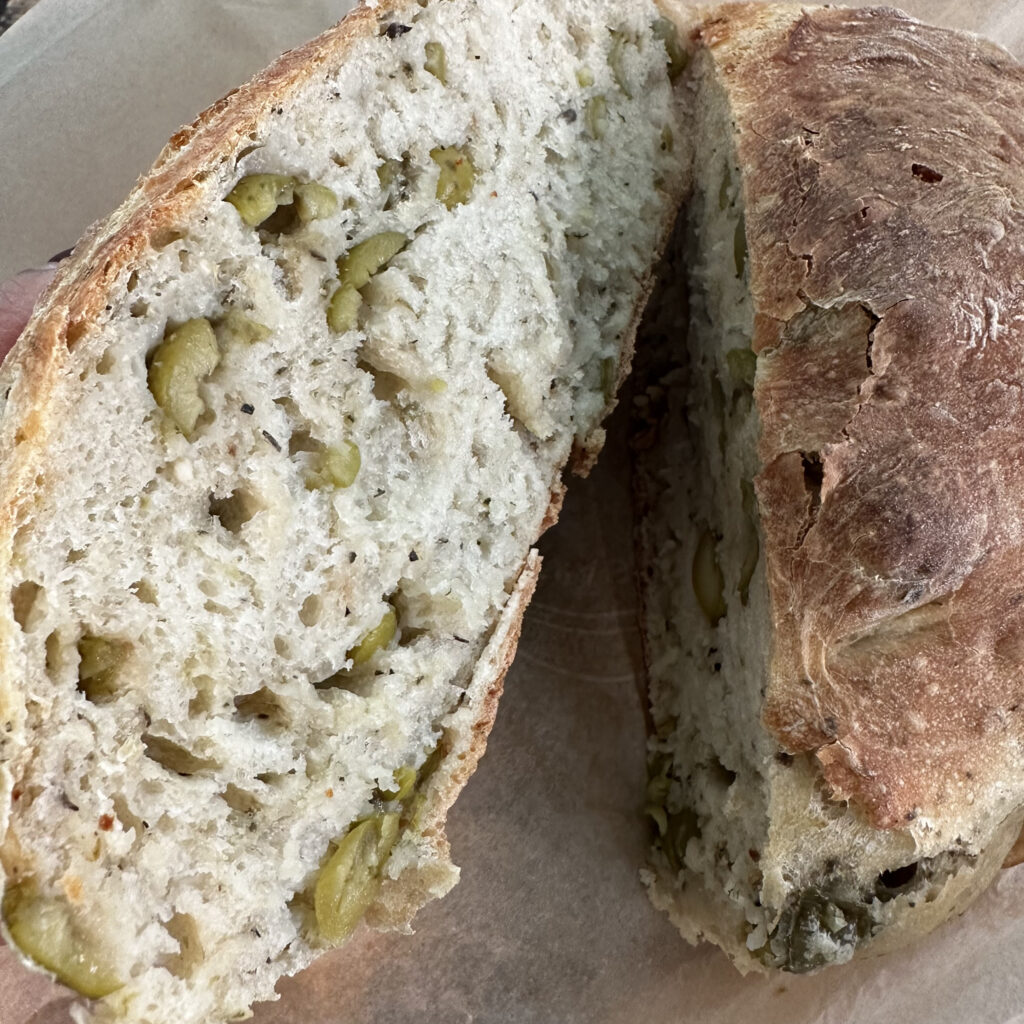
Remove the bread from the oven and allow it to cool for at least 10-20 minutes before slicing and serving. Yummy!
You can store leftovers loosely covered at room temperature for up to 3 days or in the refrigerator for up to 10 days.